
I got the best compliment a few days after Ellie’s Harry Potter party. One of her friends hadn’t read any of the books or seen any of the movies. (I’m sure a few of her friends hadn’t, but this friend happens to be the son of MY friend so I was talking to his mother about it.) In the week leading up to the party, as her attempts to at least make him watch the movie failed, I had to reassure her that the party wasn’t so immersed in Potterdom that he would feel alienated. I’m trilled that she took a chance and brought him anyway, because (I think) he wound up having a pretty OK time! But the best part was the text I got two days after the party (TWO DAYS!) asking if I could lend him my copy of The Chamber of Secrets because he blew through The Sorcerer’s Stone in TWO DAYS and she only had the books in hard cover.
If I hear that NONE of the kids had a good time, and NOBODY got anything out of this party besides maybe a chocolate frog and some jelly beans, hearing that this party inspired an adamant anti-Potter-ist to pick up the book and read it in two days….well, I’m a happy momma.
One of the favors we gave out at the party were home made wizard wands and I’m going to share with you how I made them. I first came upon the idea of homemade wands from Sugar Bean Bakers. Since her wands were for teenagers and mine would be going to eight year olds, I hesitated to use wooden skewers or chopsticks and I think I came up with a safer solution for younger kids. They could still probably do a little damage if poked in one’s eye so I would definitely recommend supervision while younger kids play. And several weeks after the party my kids’ wands (even Ben’s) seem to be holding up pretty well.
They’re perfect to make for your budding wizard or witch. Older kids can even make their own. (My glue gun is a high temperature gun, if you’re making this with kids, I would recommend using a low temp gun and perhaps having them wear a thick glove, like a gardening glove, on the had that holds the straw.)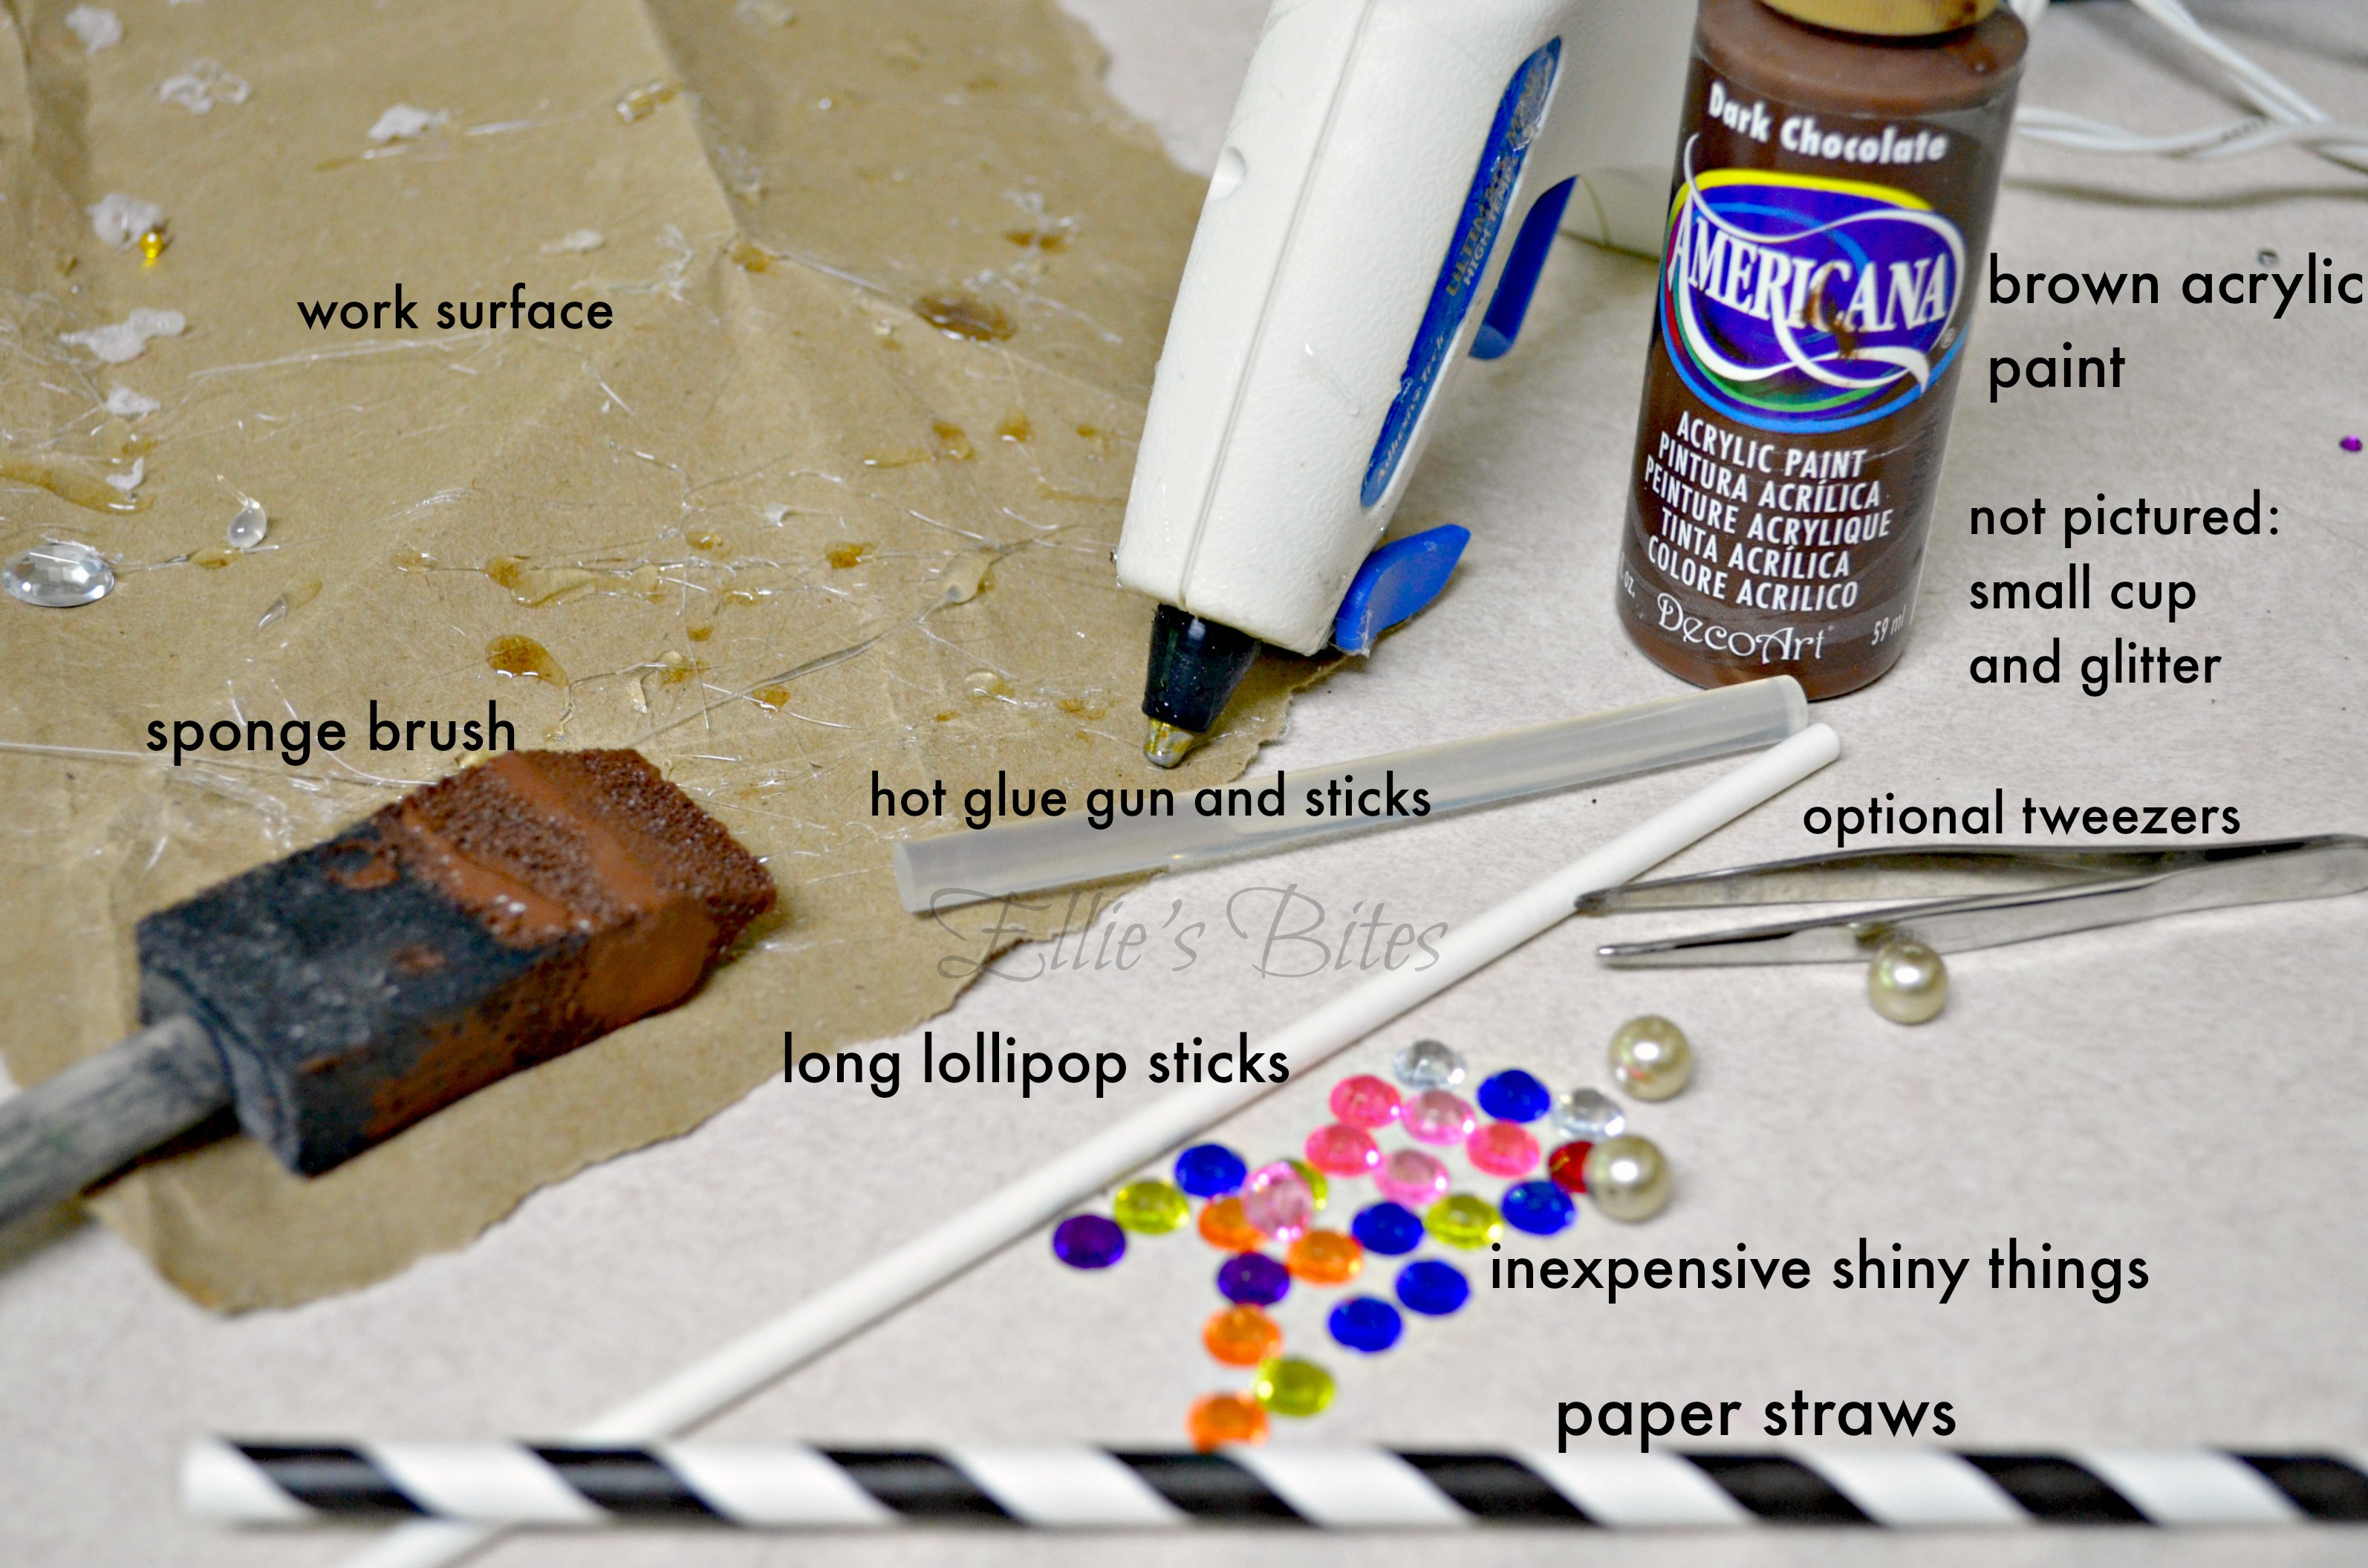 This is what you’ll need:
- Work surface (for all painting projects, I usually cut open a paper grocery bag and lay it out on my table or counter. This way I can squeeze paint directly onto the bag and fill my brush from there.)
- Paper straws (one for each wand)
- Extra long lollipop sticks (one for each wand- I found these at Michaels) Cookie sticks will not work here, they’ll be too thick to fit in the straw.
- A hot glue gun and temperature appropriate glue sticks (about 1.5 per wand- I used a high temperature glue gun)
- Brown acrylic paint
- Sponge brush
- Styrofoam block (I use desert foam- available in the floral section of most craft stores)
- Rhinestones
- A small cup with glitter
- Tweezers (optional- I started out using them but found it easier to place them by hand *note- I burned myself on the glue a few times doing this*)
As you may have guessed, I made a few before thinking to myself “hey I should take some pictures!” and I didn’t decide to add the glitter until the very end.
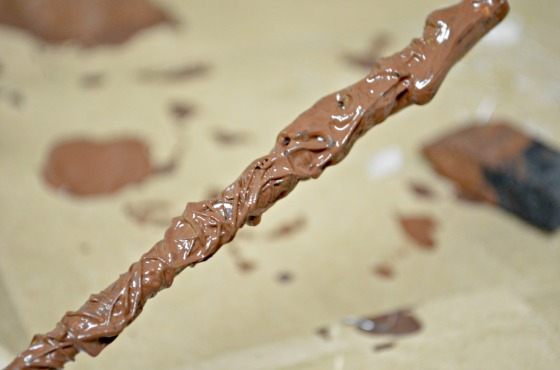
 Hold the straw in one hand and the glue gun in your dominant hand. Gently squeeze the glue onto the straw while spinning the straw around to wrap the glue strands around it.
- I forgot to take a picture so I hope I can explain the next step coherently! Place a dab of hot glue on the tip of a lollipop stick and quickly insert it into the straw. Then run a little line of glue to seal the seam where the end of the straw meets the part of the lollipop stick that sticks out. You can see what I mean by “the part that sticks out” in the picture in step five.

- Place the straws in a styrofoam block until they dry and are cool to the touch. You can tell they are dry as the glue starts out clear and becomes cloudy and a little yellow as it dries.
- Once the glue is dry, use the sponge brush in the brown paint to cover the majority of the straw. It works best to dab the corners of the brush into all of the nooks and crannies. You may need a second coat to cover it completely. At this point, I let it dry over night in the styrofoam blocks.

- Once the paint is dry, use the glue gun to add gems (you can make them as plain or as fancy as you want) and cut the lollipop sticks to different lengths (optional). Then dip the part that is not yet covered in paint into the paint and immediately….

- ….into a shallow cup of glitter. Allow the wands to dry completely. I stood them up glitter tip up in cups overnight.


So, that’s it. After a little trial and error, these were really easy to make. I hope you find it to be a fun project to get your kids making a little magic this summer. Maybe they’ll even be inspired to read the books!!!!! (You can read about the rest of the party here.)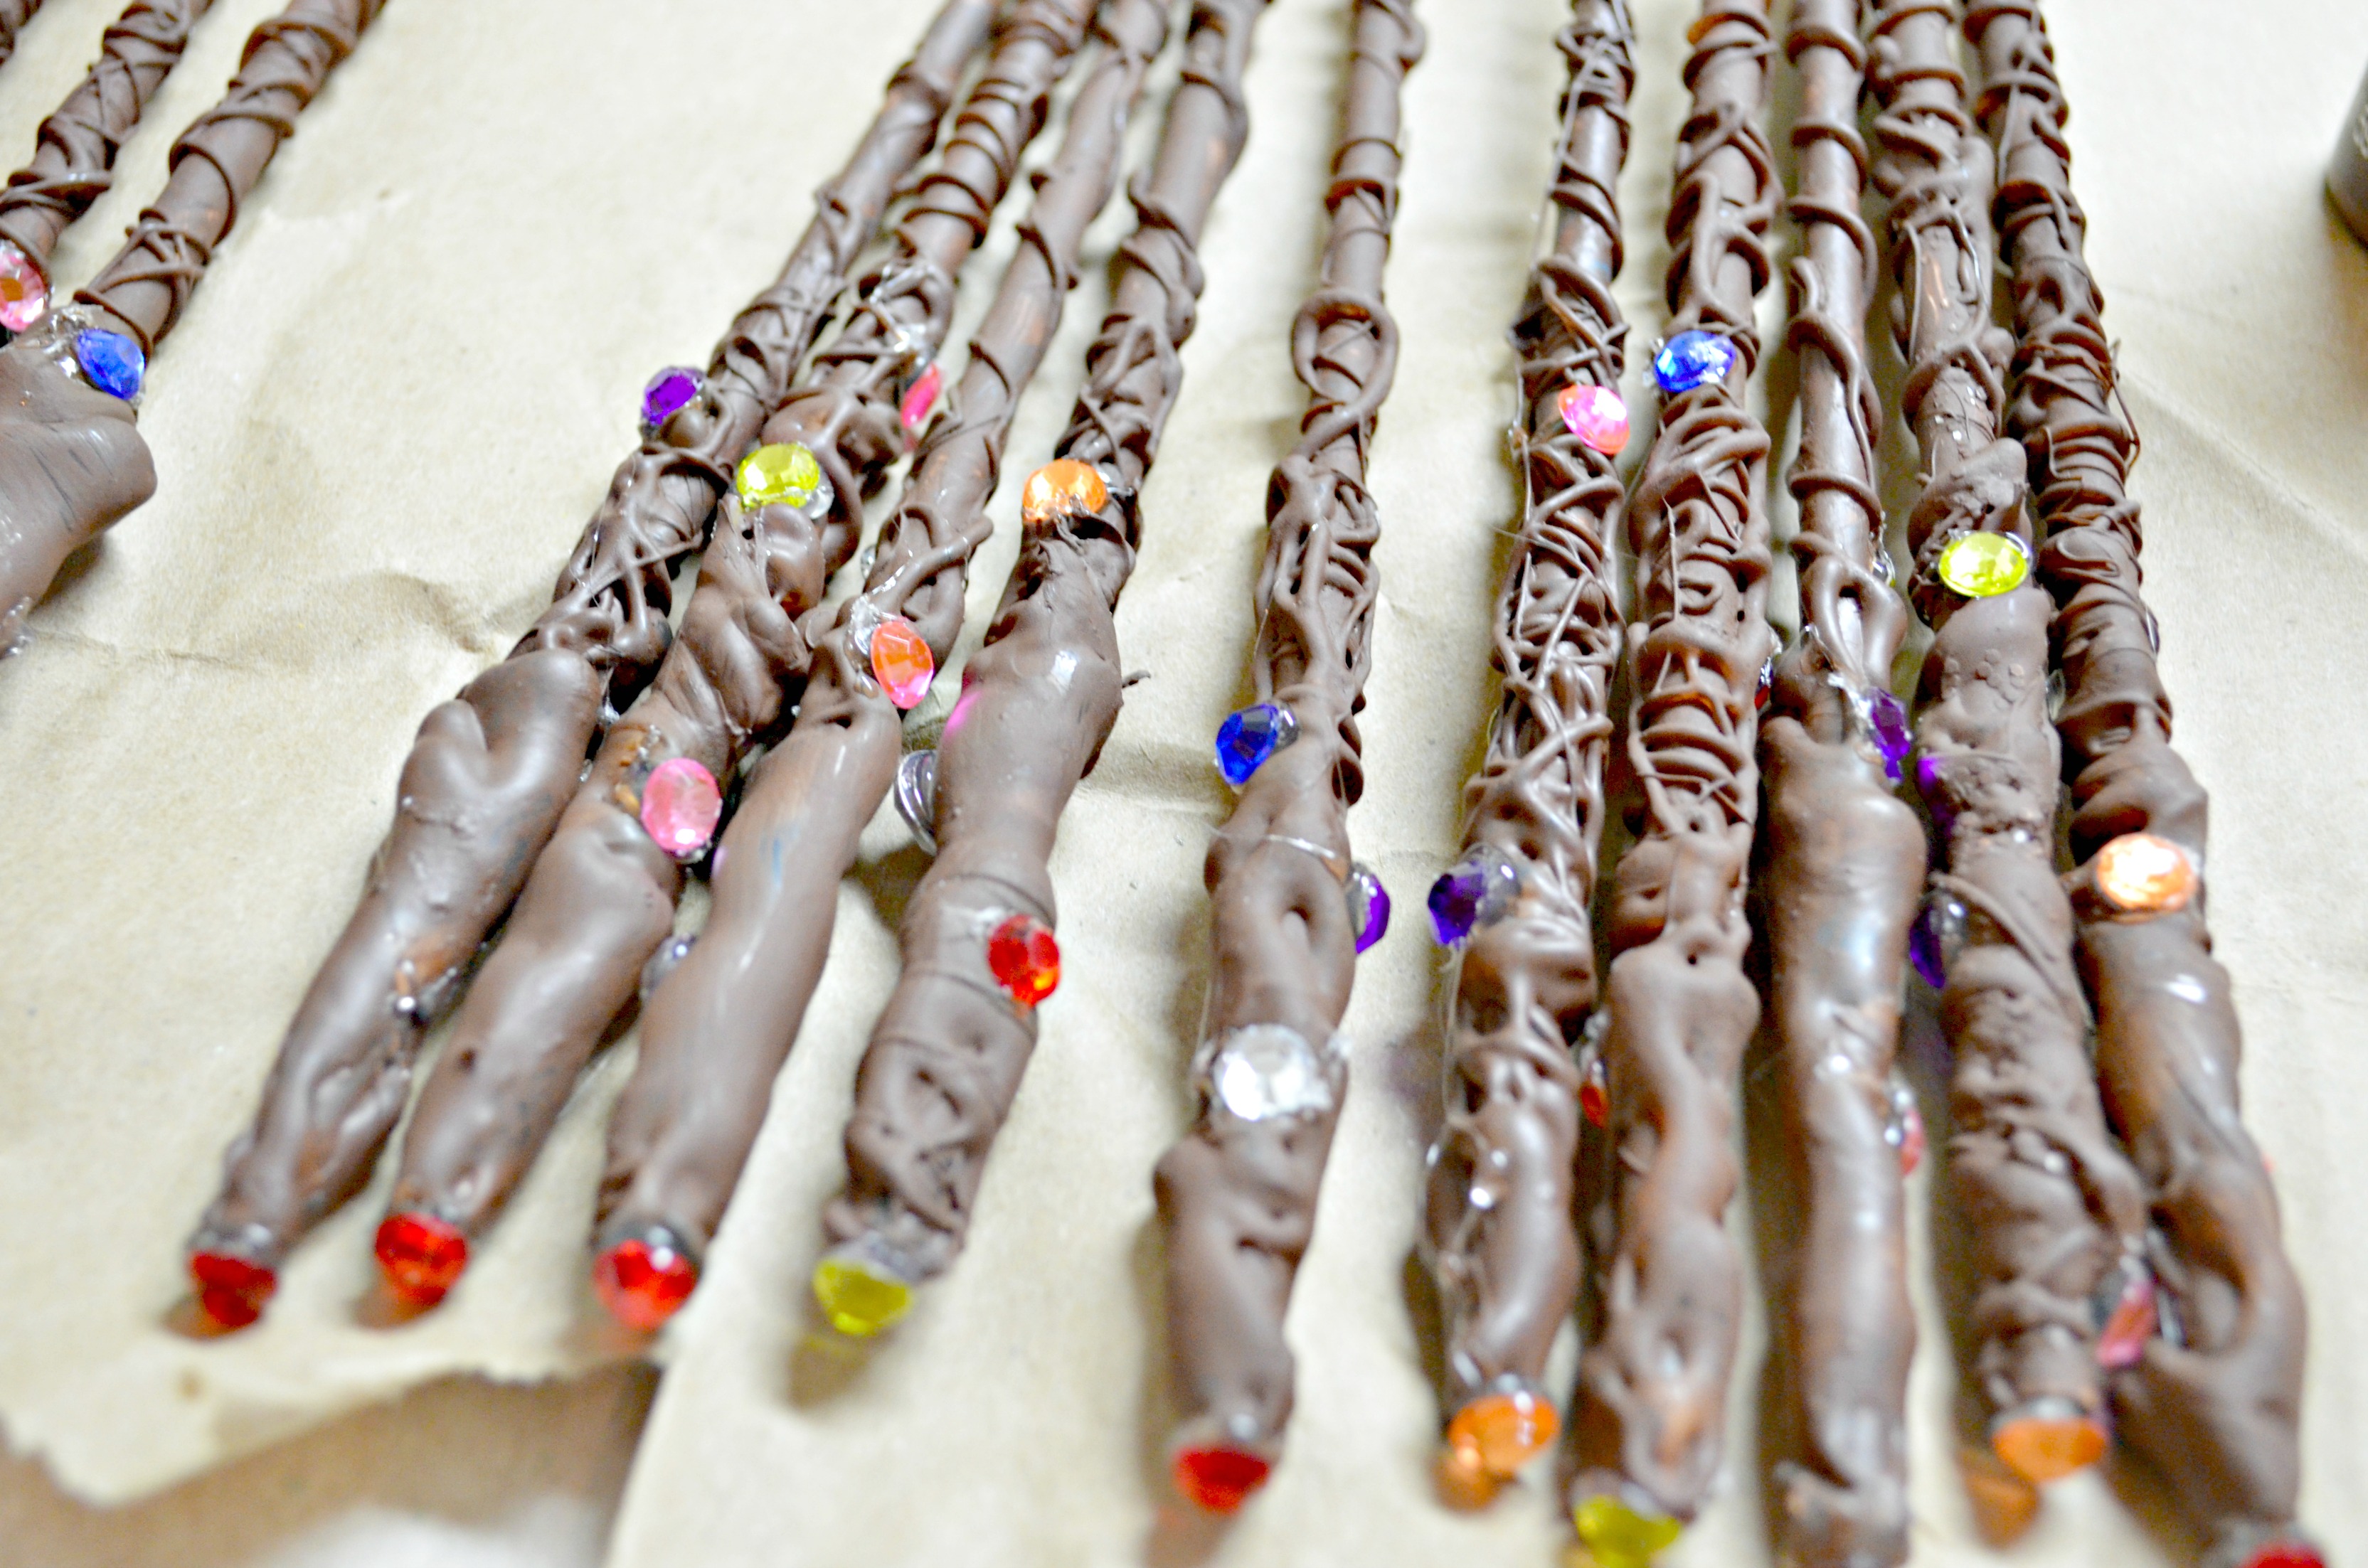
This post is linked up at:


")
")


")
")
")
")
")


