Samoa Muffins


I used to be a morning person.Samoa Muffins (Ellie's Bites)

I used to get up way before I had to be at work and I would exercise. Yes, exercise, then I would go to work, and I would get to work at least 30 minutes early- before anyone else got there- and I would drink my coffee and read my newspaper (well, I’ll be honest- do my crossword puzzle and read my comics). Then I got married. And I didn’t exercise in the morning any more, but I still woke up really early, and I would make my husband these really creative sandwiches on really interesting breads from places like Panera. And I would still get to work early and do my crossword puzzles and read my comics.

coconut and caramel

Then I had kids. And I stopped exercising, and I stopped making cool sandwiches. And I stopped being a morning person. Because, as it turns out, I can only be a morning person if I go to bed at 9pm and who am I kidding? Now, I no longer do my crossword puzzle or read my comics, and I drink my coffee cold about two hours after I get to work. And I get to work about 30 seconds before I am supposed to be there. Samoa muffins unbaked

And, guys, I’m really tired right now. Because I had to be at work at 7am today, and normally I don’t have to be there until 12. And I have this weird feeling, that although I made it through the day, and I did everything I was supposed to do, I’m not entirely sure I ever woke up! Is that weird?samoa muffins baked

I’m just going to stop talking now and share this recipe. Because it tastes really good and it’s not terrible for you. These  muffins will not make you a morning person if you’re not already one, but they will help to get you through that 10am slump. Or the 4pm slump….samoa muffins with choc and caramel

Samoa Muffins (Yes, like the Girl Scout cookie that is also known as a Caramel Delight)

Ingredients:

  • 1 cup of toasted desiccated coconut (*)
  • 1 cup of caramel sauce (**)
  • 1/4 cup of chocolate chips (I realized as I started making these that my husband had pilfered the last of the chocolate chips, so I used the only thing I could find in the house- a Nestle Crunch bar leftover from Halloween. Crushed)
  • 4 TBSP melted butter (cooled)
  • 2 C flour
  • 1 TBSP baking powder
  • 1/2 tsp salt
  • 1 cup of milk
  • 1 tsp vanilla
  • 1 large egg
  • 1/2 c sugar
  • chocolate coconut drizzle (***)
  1. (*) Toast your coconut. Heat oven to 325f. Spread coconut in a single layer on a parchment lined baking sheet and heat for about 5 minutes, watch closely, until browned.
  2. (**) Make caramel sauce. I used this recipe from The Pioneer Woman and halved it. Or use store bought.
  3. Mix 1/2 cup of coconut with about 1/2-3/4 cup of the caramel. Mix until the coconut is coated and crumbly, almost like a streusel.
  4. Preheat oven to 400f and line a 12 cupcake pan with liners.
  5. Mix flour, baking powder, and salt in a large bowl.
  6. In another bowl, mix together the egg, sugar, milk and vanilla. Add butter and stir
  7. Pour the liquid ingredients into the dry and mix until just incorporated. It may be lumpy, that’s ok.
  8. Fold in the chocolate chips and the rest of the toasted coconut.
  9. Scoop the batter evenly into your cupcake tins.
  10. Top with the caramel/coconut mixture and press the crumbs gently into the top of the muffin.
  11. Bake for 20 minutes or until a toothpick comes out clean.
  12. Make chocolate drizzle (***) Mix together 1 tbsp melted coconut oil, 1 tbsp sugar, and 1 tbsp unsweetened cocoa powder. Use a fork to drizzle the chocolate mixture over the muffins.
  13. Drizzle on some of the caramel sauce.
  14. Enjoy!

Please note- these muffins are not a substitution for actual Girl Scout cookies. Please support your local Girl Scouts!

If you like these, you may like:


Frozen Cookies

So. As I had mentioned here, our household is more than a little obsessed with the movie Frozen.

Every morning Ben wakes up Ellie the same way Anna wakes up Elsa in the beginning of the movie. Then, they silently run downstairs where they “ice skate” (slide around in socks on the hard wood) in the “ball room” (table-less dining room).

Every time I dare to shut the bathroom door, my two kids stand outside the door singing “do you want to build a snowman”.

Ben actually thinks he’s Olaf. Well, sometimes he thinks he’s Harry Potter and sometimes he thinks he’s R2D2. He’s almost four.

Anyway, I made some Frozen cookies for my friend’s daughter’s fifth birthday. Although I don’t have a tutorial or anything, I wanted to share them. They were as stressful as character cookies can be, while being so much fun to make at the same time.

Frozen Anna Elsa Olaf (Ellie's Bites)


I shared in this post how I make character cookies, since I don’t have a KopyKake. Although I THINK the skillz have improved a little, I still do it the same way. It’s tedious but it does the trick for now.

If you liked this post, you may also like:


Inspiration Challenge {Love}

I wouldn’t consider myself a conspiracy theorist, but what do you think the chances are that this winter’s freakishly cold temps and heavy amounts of snow are all masterminded by Disney’s marketing department as a tool to promote the movie Frozen?

Think about it.

Just…. think about it.

We’ve seen it three times. In the theater. Do you know how expensive it is for a family of four to go to a movie theater? The soundtrack is on in the car. Every time we get into the car. And last week, when we dropped Ben off at daycare, we got out of our car as another father and daughter were opening their car door. And guess what was playing in their car.

Still think it’s a coincidence?

I know I’ve got Frozen on the brain! When I was brainstorming ideas for this month’s Inspiration Challenge (cohosted with Melissa at Simply Sweets by Honeybee), I couldn’t help but think of the movie where only an act of true love can thaw a frozen heart.

If you haven’t seen the movie, you may not get this (but I can’t imagine you haven’t seen it….). At one point, Anna asks Kristoff if he’s some sort of “love expert”. He replies “no, but I have friends who are.” So I made Kristoff’s friends. The love experts.

Frozen Trolls Love Experts Oreo Truffles

If you saw the movie, you get why I wrote “Sven’s friends”. If you didn’t see it, just go on thinking it’s a typo. Then go see the movie. It will also explain why the love experts are rocks.

Frozen Trolls Oreo Truffles

I’m not a cake pop maker. Cake pops and I  have a love hate relationship. I love to eat them, hate to make them. These are Oreo truffles. A thousand times easier, and OMG, drop what you’re doing and shove three in your face amazing.

Ingredients

  • 18 Oreos
  • 4 oz cream cheese, softened
  • candy melts (to get the grey, I used 1 cup of pure white and 1/4 cup of black)
  1. Crush those Oreos into teeny tiny crumbs.
  2. Mix together the crumbs with the cream cheese until the crumbs come together and a soft dough forms (I found it easiest to use a hand held mixer)
  3. Using a tablespoon sized scoop, form the crumb mixture into balls and set aside.
  4. Melt the candy melts together as per the package instructions.
  5. Drop a ball of crumb mixture into the melted candy coating and roll it around until it’s covered. Slide a fork or slotted spoon under the ball and lift it out of the coating. Gently tap the fork on the side of the bowl to shake off the extra candy coating.
  6. Set the ball on wax paper. Sprinkle with green coarse sugar or sprinkles. Allow to harden completely.

This makes about 18.

Frozen Troll Cookies (Ellie's Bites)

This is what Kristoff’s friends really look like. If you’re more into cookies. I didn’t make a tutorial, but I used a Hello Kitty face cutter to make them.

Now, head over to Simply Sweets by Honeybee to see the gorgeous cookies she made. I “LOVE” them! And make sure you add a link to your love-themed project to her Linky Party. And start thinking about March’s Inspiration Challenge: The Sky.

If you like this, you may like

Sparkly New Years Cookies

Is it just me, or did 2013 go by really fast? I only just stopped accidentally writing 2012 and now I have to get used to writing 2014.

NYE 2014 (Ellie's Bites)


Ellie and I have started a new hobby together. She wanted to make a scrapbook (mostly including notes from me and her friends) so we bought some supplies and started our “Smash Books”. They are so easy to do. I have just been collecting pictures, making some notes and attaching everything with washi tape. I used to scrapbook (back when I had one child and didn’t make cookies in all of my spare time!) and this is a little different in that there isn’t any pressure to make a beautiful layout for every picture. I’m sure there wasn’t pressure before either, at least none that I didn’t put on myself. And of course, if you want a beautiful layout of every picture you can do that in your smash book too!

Anyway, I had a point. The point is that I decided to make a book for every year starting at 2013 (I’ll try to work my way back too at some point) and I’ve been going through all of the pictures I uploaded in the past 12 months. 2013 was a great year! We didn’t take any big trips this year, but we had lots of fun day trips to Philly, Hershey Park, NYC, the beach…. Ellie performed on stage- one of eight children chosen to sing a song from Wicked on stage among a lot of Broadway stars! Ben went from two to three and hit a bunch of milestones. Bryan finished year one (and a half) of graduate school! I joined a few Facebook cookie groups and made a bunch of friends. It was a pretty good year! So I made some sparkly cookies to celebrate!

I made the numbers by making royal icing transfers and covering them with disco dust while they were still wet. The icing was thick enough that they dried within an hour or so, and they were pretty sturdy so I was able to finish them pretty quickly. I did have one number break as I moved it over to the cookie, so I found an easier way to do it and I thought I’d share.

NYE 2014 RIT (Ellie's Bites)

  • Take your transfer and flip it over.
  • Pipe icing on the back side in the same color as your base coated cookie.
  • Turn your cookie over and press down veeeeeerrrrryyyyy gently onto the transfer.
  • Flip the cookie back to the right side and admire the cookie you made while knowing that you found a way to attach a slightly delicate piece of icing with minimal movement and chance of breakage.

Obviously this doesn’t work for all designs. On the 2014 cookies, there was too much chance that the numbers wouldn’t line up right so I had to do it the old fashioned way and pick up the transfer, pipe icing on the back, carry it over to the cookie, turn it the right way, place it onto the cookie, and press down gently. I broke two this way and covered my hands in silver disco dust at the same time.

NYE 2014 2 (Ellie's Bites)


I hope you had a wonderful 2013, and that 2014 is even better!

Happy New Year!


Christmas Cookies 2013

The past few days have been relatively slow considering the time of year! I had a chance to play around with the appearance of my blog. Since I use WordPress’s free blogging services, I don’t have too many options when it comes to design, but I really liked how easy it was to customize. If you are thinking about blogging, but you don’t know where to start, this is a great option. With Bryan (still) in school, and trying to stick to a budget, it’s really worked for me. And I’ve heard that when you are ready it’s easy to switch over to a self hosted site.

Anyway…. I promised cookies. (But if you get a chance, take a look around and let me know what you think!)

I didn’t make too many different types of cookies this season. Just the few that I’ve already written about here, here, here, here, and here. (OK. That’s a little more than a few.)

I did make some others and I thought I’d share in case you need some last minute inspiration, although I don’t have step by step photos or even a good completed picture.

Christmas Cookies 2013 Gold and BlueI made dozens of these and gave them away to our neighbors.

Christmas Cookies 2013 Pastels (Ellie's Bites)And this was a request from my cousin. Rain and the fact that I was running really late made it impossible to take a good picture.

These were some easy treats that can certainly be thrown together at the last minute:

Snowflakes and Chocolate Chips (Ellie's Bites)Snowflakes can be done quickly using the same color to base coat and pipe the details (or skip the base coat entirely and pipe your design directly on the cookie). Serve them on  platter of chocolate chip cookies , because, why not?

Chocolate Gingerbread Sticks (Ellie's Bites)


Cut your gingerbread dough into sticks instead of shapes and dip them in chocolate. Add sprinkles to make them really irresistible.

So there are a few last minute ideas for you!

I hope you enjoy 🙂


Chocolate Orange Coconut Cookie Bites

Spring has finally arrived. I think.

I think we had a really nice day. Then a really hot one. Then a really cold one.

Anyway. I know Spring has arrived, not only because it is after March 20th, but because I have the desire to organize my entire life and bake with citrus. Actually, the baking with citrus desire is kind of a much stronger desire. But I spend a lot of time THINKING about organizing everything in my life.

I made these (because of the desire to bake with citrus, not because of the desire to organize my life, but I DID clean up afterwards so that was a start, right?)

Chocolate Orange Coconut Cookie Bites (Ellie's Bites)

Chocolate Orange Coconut Cookie Bites

  • 1 stick unsalted butter (softened)
  • 1/3 cup brown sugar
  • 1/3 cup granulated sugar
  • 1 egg (room temp)
  • 1 tsp vanilla
  • 1/2 tsp orange extract
  • 1/4 c unsweetened dutch process cocoa powder (I use Hershey’s Special Dark)
  • 1 1/4 cup flour
  • 1/2 tsp baking soda
  • 1/8 tsp salt
  • 1 cup bittersweet chocolate chips (I use Ghirardelli)
  • buttercream (your favorite recipe- I’ll link to the one I use after the instructions)
  • 1/4 cup unsweetened coconut (sweetened is OK if that is all you can find, but the cookies will be really sweet)
  • 1 tbsp orange sparkling sugar
  • 1 tbsp orange zest

Chocolate Orange Coconut (Ellie's Bites)

  1. Preheat oven to 325F, place liners in two dozen mini cupcake cavities.
  2. In a stand mixer, beat butter and both sugars until fluffy. Add egg and mix well. Mix in vanilla and orange extract.
  3. Sift together cocoa powder, flour, baking soda, and salt directly into mixing bowl and beat slowly until just combined then increase speed until dough is smooth.
  4. Using a 1 tbsp cookie scoop, scoop dough into the mini cupcake cavities and bake for 10 minutes.
  5. Remove pan from oven, and working quickly and carefully, place a chocolate chip on top of each cookie. Bake for two more minutes. Remove from oven and let cool for five minutes in the pan, then completely on a cooling rack.
  6. While cookies are cooling, toast your coconut. (Spread onto a baking sheet and bake at 350F for about 5 minutes, stirring occasionally. Check often and remove before the coconut browns too much.)
  7. Mix the coconut with the orange zest and sugar. If you use unsweetened coconut, you might want to add more sugar to taste.
  8. When cookie bites are completely cool, top with a swirl of frosting and roll in the coconut mixture.

Chocolate Orange Coconut Cookie (Ellie's Bites)

I like the buttercream recipe from Simply Sweets by Honeybee only in this case I omitted the almond extract.

I’m linking this recipe up to Simply Sweet Saturdays. Now I’m going to go organize something. Or bake something.

 Simply Sweets by Honeybee

Little Bunny Family

A few weeks ago, my friend Melissa texted me a picture of two bunnies sitting side by side. In the picture, you see their backs as they look out into the sky behind them. It looks like they are either enjoying a nice conversation, or enjoying a comfortable silence together. Either way, they were obviously bunny friends having a nice time together.  She said she had sent the picture to our other friend, Kim, because it reminded her of them. Then, she said, she looked at it and it reminded her of me and my kids. I’m kind of obsessed with them. I really liked that, the idea of sitting and looking at the stars with a child on either side of me, talking about their day.

So I made the idea into cookies.

Easter Bunnies (Ellie's Bites)

The larger of the bunnies is my absolute most favorite cookie cutter for Easter (it came in a two pack with a carrot last year or the year before from Walmart or Target- I really should have been more diligent about remembering). You could make it a front facing bunny, absolutely, and give it a little face with whiskers and eyes, and little buck teeth, maybe include little paws holding a little carrot. Absolutely. (I may be a little dependent on the word “absolutely”?) Since I was making this based on a picture of bunnies facing AWAY from the camera, I made their backs… with little sugar bead cotton tails.

Since this is my ABSOLUTE favorite Easter bunny cutter, I wanted to make a smaller version of the same shape to be my little bunny Ellie and bunny Ben. This is what I came up with.

Mini Easter Bunny (Ellie's Bites)

I used the mini bunny face (again, I forget where this is from- maybe Wilton’s Easter mini set?) and a small heart (that I KNOW came from Wilton’s graduated heart set). I cut out the bunny face, and a heart. Then I used the pointy part of the heart to cut a notch into the bunny face. I fit the heart, upside down, into the notch, then used a knife to cut the heart flat. Then I used my fingers to pinch the bottom of the heart into two little feet. Now we have little mini bunnies that match my favorite bunny cutter!

This is a quick easy bunny set you can make if you need something for tomorrow. After baking your bunnies and letting them cool, mix up your icing and divide it into several bowls. (As many bowls as shades of icing you want.) Dye one bowl with white food coloring (if you use clear vanilla in your recipe, you may not need to do this.) If you want an ombre shading like I did, line your bowls up next to each other. Start with two drops of color in the first bowl, one drop in the second, one drop of color with a drop of white in the next, and one drop of color with two drops of white in the last. Reserve some white thick icing for outlining. Thin the rest of the white and all of the colors down to a thicker flooding consistency. I like about a five second count for this.

Outline your bunnies with white and let them set for a few minutes. Then begin to flood your bunnies with your colored icing. Do one to two at a time (depending on your climate and how fast your icing dries) then add your white polka dots while your colored base is still wet. Add a large sugar bead for a tail. Continue until all of your bunnies are covered and dotted and… tailed. Let dry completely, or overnight if you can.

So, speaking of my friend, Kim. Keep and eye out for her blog, The Cookie Puzzle, all throughout April.

Speaking of Melissa, I’m linking these bunnies to her blog, Simply Sweets by Honeybee for Simply Sweet Saturdays.

 Simply Sweets by Honeybee

Hidden Easter Eggs

I am so excited that I was a part of this fun project put together by Hani of Hanielas! We were asked to create a project (cookie, not cookie, non-baked-good…anything) that is related to Easter in some way.

I couldn’t immediately think of anything specific to do, but then I walked into Kitchen Kapers and found some fun mustache cookie cutters and an idea took hold.

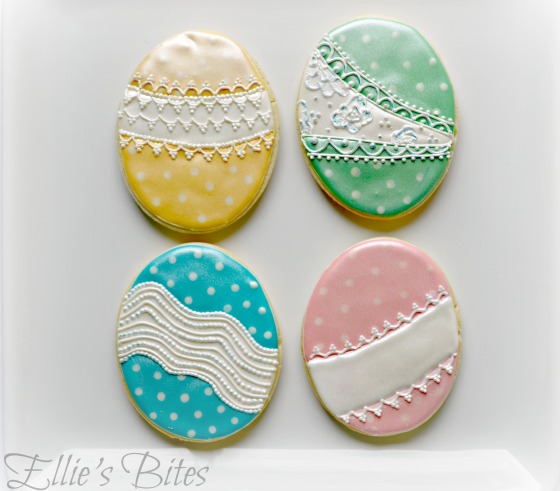
So, I baked some egg shaped cookies and played around, trying to make them pretty.

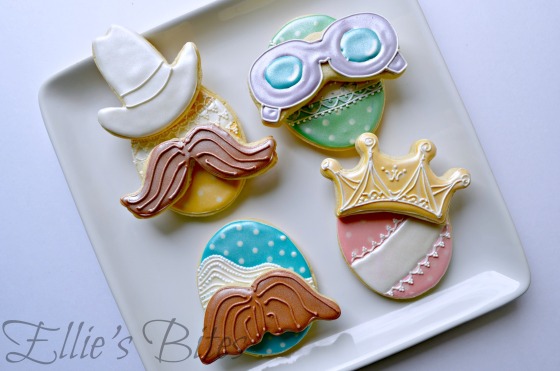
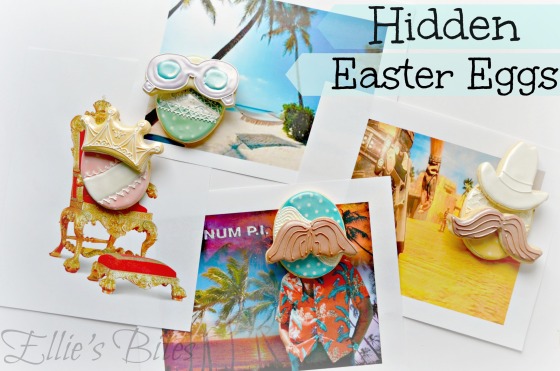
Hidden Easter Eggs (Decorated) (Ellie's Bites)Then I dressed them up a little- you know, in costumes.

Hidden Easter Eggs (Ellie's Bites)

Then I hid them.

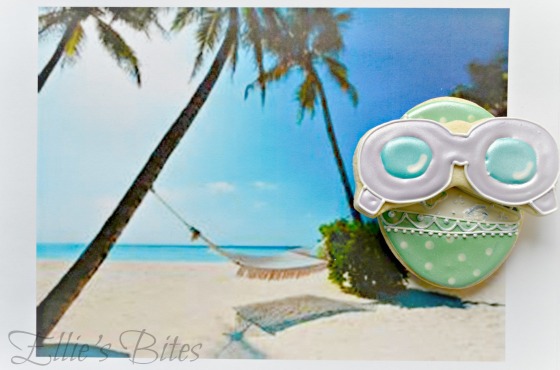
Hidden Easter Egg (On The Beach) (Ellie's Bites)I hid one on the beach……

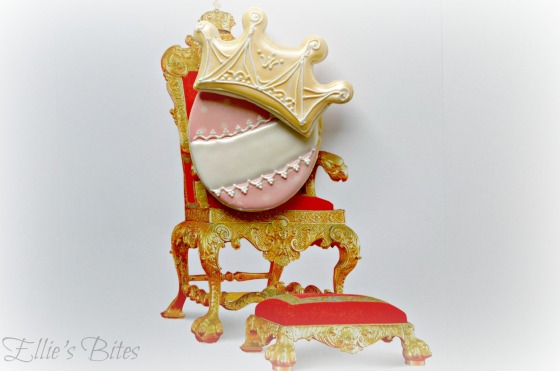
Hidden Easter Egg (Royalty) (Ellie's Bites)

One in a palace…..

Hidden Easter Egg (At High Noon) (Ellie's Bites)One in the Old West at high noon….

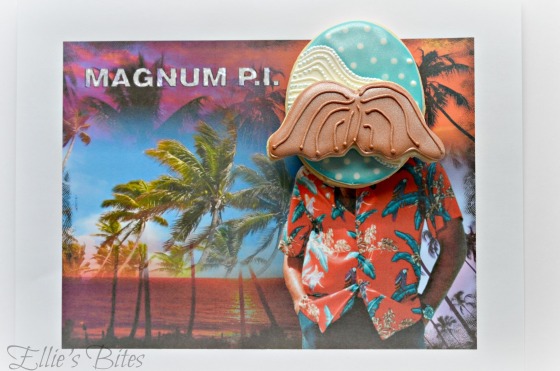
Hidden Easter Egg (Magnum PI) (Ellie's Bites)

And one in Hawaii. He’s a private investigator now.

Hidden Easter Eggs 1(Ellie's Bites)

Now you have to see all of the other amazing projects! I get a little flutter in my chest when I think that my project stands among this talent!

3D Easter Bunny by Marielle – De Koekenbakkers

Chick Cupcakes by Robin – Bird On A Cake

Mrs. Bunny Centerpiece by Myriam – Chapix Cookies

Cheesecake Easter Eggs by Beth – Hungry Happenings

Cho “Bunny” Greek Yogurt Pops by Jill – Kitchen Fun With My 3 Sons

Hidden Easter Eggs by Stephanie – Ellie’s Bites

Easter Egg Cupcakes by Liz – Hoosier Homemade

Easter Treat Pouches by Elena – Just Me

Mini Meringue Cake by Karyn – Pint Sized Baker

Bunny Cake by Kathia – Pink Little Cake

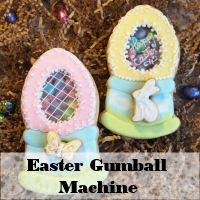
Easter Gumball Machine by Marlyn – Montreal Confections

Easter Island by Laura – A Dozen Eggs Bake Shoppe

Easter Bunny Sandwich by Michelle – Creative Food

Bunny Garland by Sue – Munchkin Munchies

Egg Hunt Pound Cake by Jennifer – Not Your Momma’s Cookie

Dutch Easter Egg by Lorraine – Lorraine’s Cookies

Easter Egg Painting Chicks by Mike – Semi Sweet

Easter Basket Cookies by Amber – Sweet Ambs Cookies

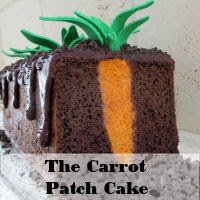
The Carrot Patch Cake by Kim – The Partiologist

Cookie Bunny Pop by Meaghan – The Decorated Cookie

Pretzel Bunnies by Sarah – Miss CandiQuik

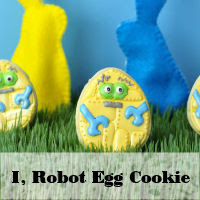
I, Robot Egg Cookie by Hani – Haniela’s

Irish Coffee Caramel Cookie Cups

Irish Coffee Caramel Cookies (Ellie's Bites)

I’m going to go ahead and bet that the first person to put alcohol in coffee had to be the mother of an almost three year old. It just seems like the perfect example of invention being born of necessity. Of course the idea of taking this alcohol spiked coffee and baking it into something probably came from a mom with a food blog, right?

Caramel Filled Irish Coffee Chocolate Cookie Cups (Ellie's Bites)

My friend Melissa, at Simply Sweets by Honeybee, has been hosting these weekly link parties. There are no rules, she just wants anyone to link up anything they have been working on. Actually there is one rule- it must be your own work. Everyone likes to show off a bit and have their work appreciated.

I haven’t exactly been using these weekly link parties to get attention- although it would be nice. I mean I’m home all day trying to keep two kids alive and happy, doing laundry, and cooking nice healthy meals. It’s always nice to hear someone say “great job, Steph!” when I know I’m not going to get it from said kids or the husband who benefits from the clean clothes and healthy meals. Lol. And every week, I get a “Great job, Steph” from Melissa. It’s awesome!!!

Anyway- that’s not why I’ve been doing it. I’ve been trying to stretch my imagination and comfort zone- encouraging myself to try making something other than a decorated cookie or a recipe that came from someone else’s work. I’m making it a goal to take a recipe and make it my own, then to play around with the styling and photographing of whatever baked good comes out of my oven.

This week, I had the idea of Irish Whisky Caramel in my head (probably from Pinterest) and with St. Patricks Day coming up, it was a good time to try this. I can honestly say, I was determined to make this work. It took me two batches of caramel and three rounds of cookie trials to get what I wanted, but I’m glad I persisted because these are GOOD.

Irish Coffee Caramel Filled Cookie Cups (Ellie's Bites)

Before making these, you’ll need to prepare a batch of Irish Whisky Caramels. I used this recipe only I used 1 tsp vanilla rather than the whole vanilla bean and I skipped the step of sprinkling extra salt on top.  Next brew yourself a cup of strong coffee. I boiled it a bit to reduce it and make it a little stronger. You can definitely use it strait from the cup. Add a splash of Bailey’s Irish Creme to the coffee and stir well. If you have a responsible adult with you who can watch your kids, reserve a tablespoon of the spiked coffee, let that cool completely, and drink the rest. If it’s not a good time for you to drink it, just set the whole thing aside to cool off. You’ll only be using a tablespoon full.

Ingredients

  • 1 stick of unsalted butter softened
  • 1/3c sugar
  • 1/3c brown sugar
  • 1 large egg at room temperature
  • 1 tsp vanilla
  • 1tbsp cooled coffee mixture (with or without Baileys)
  • 1/4c unsweetened cocoa powder
  • pinch of salt
  • 1/2 tsp baking soda
  • 1 1/4c flour
  • Irish Whisky Caramels cut into 1/4inch squares
  1. Preheat oven to 325* and line 24 mini cupcake cavities with mini cupcake liners.
  2. In a stand mixer with a paddle attachment cream butter and both sugars until fluffy.
  3. Add egg, vanilla, and coffee mixture. Mix until combined.
  4. Mix in cocoa powder until combined, then add the salt, baking powder, and flour. Mix everything until combined.
  5. Use a 1tbsp cookie scoop to scoop dough into the cupcake liners. The dough will be sticky.
  6. Bake for 10 minutes.
  7. Take the pan out of the oven and, working quickly, gently press a caramel square into the top.
  8. Bake an additional 2 minutes.
  9. Remove from oven and let cool in pan until the cookies are set up (about 10 minutes) then cool completely on a cooling rack.

Caramel Collage

The longer you let these set up, the more the taste of Baileys and coffee will come out. If you want you can sprinkle a little salt on top or pipe a little whipped cream, or just serve with some Irish Coffee.

 Simply Sweets by Honeybee

Caramel Maple Bacon Cookies

This week, I made about a hundred trillion baby shower cookies. It is definitely the season for babies!

Instead of sharing those today, though, I played around and made something that has been on my mind.

A few months ago I ran to Whole Foods to pick up a few things and they were having a sale on their flavorings and extracts. I bought a few, including maple extract, with no idea what I would use them for. I can’t believe it took me this long to figure out how to use it!

Caramel Maple Bacon Cookies (Ellie's Bites)

So, these cookies take a little prep work. A few hours before you plan to bake them, you’ll need to make some bacon, using the bacon making method of your choice. Just make it crispy. I bake mine at 400F for 12 minutes or so. Then you’ll need to brown 1.5 sticks of butter. Do this by melting the butter in a sauce pan. Once it’s melted keep stirring it until it turns brown and smells delicious. Then pour it into a bowl and put it back into the refrigerator until it becomes solid again. Third, make some caramel sauce. I used this recipe by Pioneer Woman, you can use any recipe you like or you can use a store-bought jar. Finally, while your bacon is cooling, your butter is hardening, and your caramel is chilling, make yourself a spinach and egg white omelet and squeeze in an hour on the elliptical. Or referee 10 rounds of “I don’t WANT to watch Willy Wonka again, MOM why do we always watch what HE wants to watch???!!!!”
Once your butter is hardened (but still soft, do you know what I mean?) gather the rest of your ingredients.

  • 1.5 sticks unsalted butter (browned)
  • 6 Tbsp sugar
  • 6 Tbsp brown sugar
  • 1 egg
  • 1 tsp vanilla bean paste
  • 1 tsp maple extract
  • 1/2 tsp baking soda
  • a pinch of salt (optional- the bacon will make the cookie salty)
  • 1.5 cups flour
  • 8 slices of crispy bacon chopped into small pieces
  • caramel sauce for drizzling
  1. Preheat oven to 325F and line two baking sheets with parchment paper
  2. In a stand mixer with paddle attachment, beat together the butter and the two sugars until fluffy
  3. add  egg, vanilla, and maple extract. Mix well.
  4. Add baking soda, salt, and flour and mix until incorporated.
  5. Fold in the bacon
  6. Bake for about 18 minutes or until lightly browned
  7. Cool for a few minutes on the baking sheet then move to a cooling rack to cool completely.
  8. Heat caramel sauce in a small bowl in 15 second increments until it is pourable. Drizzle the sauce over the cookies.

Caramel Maple Bacon Cookie (Ellie's Bites)

Making the caramel was tricky for me. I’m not sure what happened to the first batch but it was grainy and all wrong. I threw that batch out and made another one. This one worked perfectly, only I think I let it go for too long, as it was a little harder than a sauce. It was a little tough to drizzle, but it was perfect for sandwiching between two cookies.

Caramel Maple Bacon Cookie Sandwiches (Ellie's Bites)

Either way you make them, you could probably serve them with a cup of coffee and a spinach and egg white omelet and call them breakfast!

I’ll be linking these to Simply Sweet Saturdays at Simply Sweets by Honeybee.

 Simply Sweets by Honeybee